Tuesday, December 27, 2016

Creating Christmas Gifts

The Christmas season is a busy time no matter which way you slice it. We need to make time for shopping, cooking, baking, visiting and still go to our jobs. To make that all go a bit smoother and to keep things as inexpensive as possible Ryan and I did some DIY Christmas gifts this year.


Just like last year, we took our own photos and made cards to send out to family and friends. We made 35 this year and even though it was time consuming I absolutely love the outcome. I think they are much more unique and creative than the photo cards that you can get printed professionally. 


I had the idea to make a tree ornament for Ryan this year, something personalized and meaningful, and even though he had no idea I was doing that he still came up with the same idea. We made ornaments for his little sister and also for our 2 secret Santa's. 
I don't know either of the people we chose so we did a quick little Facebook search and came up with these. Ryan made and painted the Blue Jays logo and I did the lobster claw. I think they both turned out great!


I've been making stockings for several years now and I really love it. Bentley just turned one in October and he finally gets his own stocking. I had hoped to make one for him last year but it didn't work out. I previously made one for his Mom, Dad and sister too.


Though it has my name on it this one isn't for me. Another Dani has been included in the family and this one is for her. I think the 2 stockings I made this year are my favourite ones I've done. 


All the kids gifts were handmade this year in hopes that they might be a little more meaningful and might last a little longer that the typical toy gifts.

For my older niece and a friends daughter I made these adorable little bubblegum machine tree ornaments. They only cost a few dollars to make and are a fun addition to the tree.


For the next 4 kids we made them each a bunny. Yes, you read that right: we cut, sewed, detailed and all-in-all made each child there own stuffed bunny. Each one is slightly different and they all have different coloured tails to keep from being confused. 


Lastly, instead of a bunny, Bentley got a dinosaur. I made this one too. 


Everything seemed really well received and I'm hoping to continue this in the future. I think a meaningful handmade gift is always the best to receive. 

Thursday, December 15, 2016

Pre-Christmas Creations

'Tis the season to celebrate with family and friends, and that's just what we've been doing. Ryan and I attended two Christmas parties this weekend and I got to be creative before both. 
I volunteered to bring a dessert item to both parties and spent ALL day on Saturday baking. 
I made a cake with 5 layers and 3 trays of cookies, my kitchen was the messiest it's probably ever been and I had to walk to the grocery store in between batches to get more eggs. Fortunately the store is only across the street since it was one of the coldest days this year and my poor van died in the garage at home.

After 4.5 hours of baking and with almost no time to get ready, we set off to the party. I'm going to tell you, I made the ugliest cake ever, it's could win awards for its ugliness, but when I arrived with it everyone seemed pretty impressed!! 


Supper was amazing. Curried cauliflower, though I expected to dislike it, turned out to be really delicious. Veggie pies, mashed potatoes and Caesar salad were excellent as well. There was a great selection of vegetarian food, which isn't usually the case at parties, so it was easy for everyone to enjoy. My 3 best friends are vegetarian as well and all in attendance. 

At dessert time I was told that my gingerbread cake was "the best cake I've ever had" by one of my friends and that really made my night. Baking all day paid off I guess!

Our second party was a "tacky Christmas sock" party. Better than sweaters in my opinion. Again, I was busy doing.. I don't remember what, all morning before the party so we were a bit rushed getting ourselves ready. Fortunately I did all the baking the day before so the gingerbread cookies were ready to go when we were! 

A quick trip to the dollar store to buy sock decorating supplies and then about 10 minutes at home with the hot glue gun and double sided tape had us ready. 


Ryan had a lovely oven mitt creation and I went with garland and jingle bells up to the knees. The (approximately 1 million) kids at the party seemed to like our choices, and that's what counts. 


I'm really looking forward to spending more time with people over the holidays and being festive! 

Thursday, December 8, 2016

The Weekend

This past weekend it finally started to feel like the Christmas season for me. Even though I was finished my Christmas shopping in October, I’ve had my tree up with wrapped gifts underneath since mid-November and I’ve been doing little Christmas DIY’s in my spare time for over a month now I still didn’t quite feel as though the season had begun. Now it has.

On Friday night Ryan and I went to the Snowflake Festival in St Albert to see the big tree lighting. Of course, we didn’t actually see the lights come on, but we weren’t really there for that anyway. 95% of the reason we came was to ride on the horse drawn wagon! We saw them last year but the line up to get on was crazy. 


When we arrived we were quickly distracted by a free photo booth and got in the short line to have our picture taken. We knew the line would only grow as the event went on.

As with the photos we knew the longer we waited the longer the horse line up would get. In fact, it was already really long when we got there. Fortunately for me, the line was still at a length that we were willing to stand for and we happened to be right beside a booth giving out free hot chocolate!! 
We did end up waiting quite a while but amused ourselves with people watching. And once we got on our straw covered wagon and headed off into the crowded streets, we continued to watch the people around us. 


The rest of the evening was spent checking out the different booths and hunting for free cookies. We found donuts instead!


On Sunday we went to Elk Island again. It's been quite a while since we visited and we felt like getting out for a hike. 

We chose a 3km Trail that we haven't done before, bundled up in our winter layers and got going. We both walk fairly fast so the Trail only lasted about 45 minutes or so and was pretty uneventful, just a nice walk through the trees and a good excuse to be outside. What was more exciting was actually seeing some animals along the road this time! We saw several Bison within a few feet of the car and also a Coyote down by one of the ponds. We very excitedly stopped to snap a few photos before going back home. 


I love that we live so close to one of the National Parks and we get the opportunity to be away from the city without needing to drive for hours. 


Thursday, November 17, 2016

Easy Chocolate Cupcakes

Do you ever go to a bakery or restaurant, eat something delicious and then think to yourself, “I could make that?” I do. And I usually consider that I could make it myself because it’s A: too expensive to buy again, or B: I bought it somewhere that I can’t easily get back to for re-purchasing.


In this particular case I had a cupcake from LaHave Bakery on my last trip to Nova Scotia and I couldn’t get it out of my head, I also can’t go back to buy another one anytime soon.


To make myself feel better about that, I found a recipe for chocolate cupcakes, made my basic vanilla icing and then changed that vanilla to almond. Of course, it's never going to be exactly the same as what they make, even if I had their recipe, but it's reminiscent and that will have to do.
 

To be honest, I don’t actually know for sure if the icing in LaHave had almond extract in it, but it sure smelled like it. Even if it didn't, I have almond extract already from a recipe I made last Christmas and this seemed like a nice place to use it. I was actually pleasant surprised by how much more I like almond versus the traditional vanilla.


Here are the recipes I used:
 
Chocolate Cupcakes (makes 12)
  • 1 cup flour
  • ½ cup unsweetened cocoa powder
  • ½ tsp baking powder
  • ¼ tsp baking soda
  • 1/8 tsp salt
  • ¾ + 2 tbsp granulated sugar
  • 2 large eggs
  • ½ cup milk
  • ¼ cup canola oil
  • 1 tsp vanilla extract
  • ¾ cup chocolate chips
 
Almond Icing
  • 3 tbsp room temperature butter
  • 3-4 cups confectioners sugar
  • 3-5 tbsp milk
  • 1 tsp almond extract (or change the extract for a different flavour!)
  • Splash of vanilla extract
  • Pinch of salt
 
Preheat the oven to 350F
Grease or line your cupcake tins or cake pan
Combine flour, cocoa, baking powder, baking soda, and salt
In a separate bowl combine sugar, eggs, milk, oil and vanilla. Whisk until well mixed
Combine the two mixtures and mix well, continue to scrape down the sides
Fill the tin(s) about halfway
Bake approximately 15-20 minutes
Wait until the cake is fully cooled before icing
 
To make the icing just combine all ingredients and mix well.
I used my emulsion blender to get the icing smooth and creamy.
If the icing is runny you can add more icing sugar, if it's dry add a bit more milk.
 

Thursday, November 10, 2016

Spending Ban

I’m going to preface this post by saying that I do not understand why talking about money is such a taboo subject.  I’m going to talk about it anyway.


Do you remember a while back when I made it my goal to save $8000-10,000 by March 2017? That wasn’t just something to say, I had every intention of making that happen. I STILL have every intention of making that happen, and I’m almost there.


Back in July I came up with the idea of putting myself on a spending ban. If it isn’t immediately clear to you, a spending ban means no spending outside of what must be paid.


For 1 full month there would be no frivolous spending. No buying things just because. Any money that would be going out for the month was accounted for. Obviously, all of my bills still need to be paid and that is already worked into my budget. The other things that I have to spend money on are somewhat flexible. Gas and groceries change price depending on the day, how much I get, etc. I looked at previous spending to create a budget for those.


For the purpose of general savings and not just for this month I looked into lowering some of my permanent bills. I had no luck finding cheaper car insurance but I did manage to get my phone bill lowered by $10/month.


As of August 1st the ban began. As is normal, when I tell myself that I can’t do certain things those things end up being exactly what I want to do. I found myself wanting to go shopping a lot for the first week or so, but it eventually passed. Winning at my own challenge is very appealing to me and I had every intention of doing so.


I considered ahead of time that we would have one night in August where we would be going out and likely couldn’t escape from a little spending. My answer to that is our “occasion” piggy bank. Sometime back Ryan and I started saving any cash income in a special spot for use on special occasions, vacations or rainy days. We decided we would be willing to spend a specific amount that night and that is all that we took.


At the end of the month I saved almost exactly what I had hoped for. I went over on my grocery spending but spent less on gas. I made a little bit more than I was expecting as well. I also discovered that this month was the perfect time to use those gift cards I’ve been carrying around for over 2 years now and that allowed me to spend a day at the mall with my friends and not feel any pressure to spend.


I consider my first spending ban a success and I am now on my second one for the month of November. I also finished all my Christmas shopping in October which should allow me to have a stress free November/December where I am able to save money instead of going into the red as so many people do. The fact that November happens to be a 3-paycheque month certainly doesn't hurt either.
After November my next challenge will be to survive a 2-3 month ban sometime in the New Year!


Thursday, November 3, 2016

Spinach, Mushroom and Butternut Squash Lasagna

This was my first ever attempt at making lasagna and I think it turned out really well. I was looking online for an idea of what kind of flavors I could use to make vegetarian lasagna but also make it more exciting than your typical lasagna without the meat sauce.

I didn’t look at anyone else’s recipe, just took ideas that looked good. I kept seeing butternut squash come up and even though I can’t remember having ever eaten it, it seemed super appealing. Adding spinach and mushrooms was just a great way to add extra flavours and texture since I wouldn’t be using meat sauce or ricotta cheese.


Here is what I used:
Lasagna noodles
Tomato and herb pasta sauce
Butternut squash (mashed)
Spinach (frozen, thawed and drained)
Mushrooms (sliced and cooked)
Shredded cheese (marble and mozza)


Start by putting sauce in bottom of pan so nothing sticks
Make your layers, anyway that suits you
I did:
Noodle- Sauce – cheese – butternut mash
Noodle- sauce- spinach – mushrooms – cheese
Noodle – sauce – butternut mash
When the layers are done top with lots more cheese
Cover with foil
Bake at 425F for 1 hour
Uncover for the last 5-10 minutes to ensure melty cheese and a bit of a crisp


I was so pleased with this recipe, it turned out even more delicious than I imagined. Having mashed butternut squash replaced the ricotta cheese nicely and all the flavors worked together perfectly. Everything was hot and gooey and melted.
The best part is, with the noodles I had and 1 full butternut squash I had enough to make 2 separate lasagnas so I get to have it again!!


Monday, October 31, 2016

Lost; Edmonton Corn Maze

The other day Ryan and I wanted to check out the Edmonton Corn Maze and so we did.


During last year’s adventure at the maze we did pretty well except for one area that we got hopelessly lost in for way to long so I was feeling good about this year, that can’t happen two years in a row, can it?


The first and very obvious difference between this year’s trip and last was that it was absolutely packed. We were one of only a handful of cars last year and now there are hundreds.


I guess we shouldn’t have been shocked though since it was the weekend and an absolutely beautiful day.


After paying our admission we followed the hoards of people onto the grounds ready to get lost in the maze.


We took a picture of the "map" which is an aerial view of the maze and shows off the amazing designs that are created every year. In a pinch, if you can figure it out, this map is really helpful to get you moving.


At the entrance to the maze are quizzes for people to bring along. When you find the #1 post, the answer to the question will tell you if you should go right or left. After a few years of experience, I've decided it's always best to grab more than one quiz and the second one should be something you think will be easy. Keep that as a back-up in case you really can't figure out the answer to your first quiz.


Once we got started it felt really easy. We just walked along, following our very basic instinct and almost never got lost, not until we got to post number 5.


We were REALLY sure what the correct answer was and it said to go left, so left we went. We took every loop and path and turn in that direction and it led us nowhere. I was sure there was a path somewhere that we missed and would lead us out of the maze at the halfway point. Eventually one of the staff who was walking around asked how we were doing, we explained our dilemma and she informed us that we were meant to go RIGHT at the post. I’m still pretty sure the answer to the question was wrong, but sure enough when we found the fifth post again and went right we got out almost right away.


We took the time outside the maze to put our sweaters in the car and then went straight back in to try to conquer the second half. This side seemed fairly simple, we never got really lost. What we did get was covered in mud and toasty warm from the sunshine. It seemed like we were 2 of only a few people that thought ahead enough to wear rubber boots.


Back outside the maze again, having completed it without any issues, we explored the rest of the grounds. I really wanted to go on the jumping pillows but there were too many kids to squash so I didn’t. We checked out the petting zoos inhabitants; pigs, chickens, bunnies, cows and goats. We wanted to play some of the games as well but it was so hard to get near anything with the many families running everywhere.


Eventually we gave up and decided to go home. I’m considering going back again before it closes anyway!


Thursday, October 27, 2016

Simple and Delicious Homemade Pizza

Do you ever get that feeling like you’re bored of even your favorite foods, like it’s time to try something new? Sometimes just a new brand or flavor will do the trick.
Ryan and I have been feeling that way and have been making an effort to try more new foods. We've also started making more food at home as opposed to buying it premade.

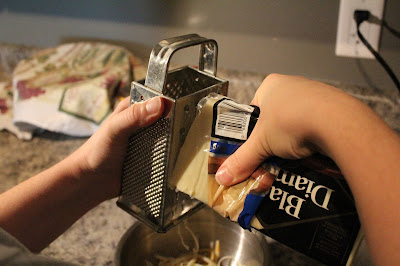
For a relaxing Sunday at home we opted to make pizza. Since I am a vegetarian and Ryan isn’t we make a half and half. I don’t like subjecting him to the plain cheese pizza if I don’t have to so I pile the sliced mushrooms on my side and Ryan gets all the pepperoni.

Creating a pizza

You will need:

Crust mix/premade crust/premade dough
Sauce
Mushrooms
Pepperoni (or any other toppings you prefer)
Marble & Mozza cheese
I’m not going to tell you how much of each will need because it would be based on what size pizza you are making and how heavily you like you toppings piled on.


Preparing ingredients for homemade pizza 

Preparing ingredients for homemade pizza

Preheat the oven to 450F
Make your crust
Let rise for 10-15 minutes
Slice and cook mushrooms (I make mine in a frying pan)
Slice pepperoni
Shred cheese (lots of it!)
Spread the dough onto a 12 inch pizza pan or cookie sheet
Pinch the edges up to make a crust
Layer on your toppings in whatever fashion suites you. I like mine underneath the cheese.
Bake 10-15 minutes or until the crust is golden, toppings are warm and cheese is melted
Broil on 525F for a about 2 minutes to get the cheese extra melty and add a bit of a crisp


Preparing ingredients for homemade pizza

Preparing ingredients for homemade pizza

Preparing ingredients for homemade pizza

We’ve made this same pizza twice now and it’s so satisfying. Both of us like it more than store bought or take-out because it isn’t greasy at all and it is made exactly how we like.

Do you want a crispier crust? Bake it longer! Don’t love having so much pizza sauce? Don’t put much on!

I forget sometimes that I like to cook, not just bake, so it's nice to try new things. What should I make next???


Monday, October 24, 2016

Pumpkin Patch

Since this was our second year doing it I'm now going to call visiting the pumpkin patch a tradition. 

Last year when I made pumpkin pie it was with a pumpkin that I bought at the store and we got our carving pumpkins from the patch. This year I got both in one stop. 

Prairie Gardens is a great local place with tons of U-pick pumpkins in different varieties and sizes and for really reasonable prices. 


When you arrive there is a huge field to park in and that is right next to where the u-pick is, otherwise you would get on a school bus which takes you just down the road to the rest of the farm. Ryan and I haven't gone over but I've been before and it's really great if you have little ones. There are things to buy, great food and plenty of games and entertainment. 


If you go just to buy pumpkins there is no admission, you just pay for what you take. I knew I wanted to get a few pie pumpkins but I hadn't thought about what I wanted to carve this year. We bought 3 different varieties last year that worked out great. 

We walked up and down the rows looking for desirable looking pumpkins. Ryan really likes the perfect round ones and I like to have a great stem. We each found a few that we liked. Some white, some big and some really tiny. 


Since half the fun is looking for them we took our time. Eventually we got a bit cold and on his shortcut to the car for mittens Ryan got a little zap from an electric fence. Fortunately it was more shocking than painful. 

With warm hands we continued our hunt. I found some perfect little ones for my pies and we each settled on small pie pumpkins for carving as well. Since we live in an apartment this year we don't have much space to display big jack-o-lanterns anymore. 


With arms full we headed over to pay. They have a neat system to measure the pumpkins and you are charged based on size. For a whopping $18 dollars we got 7 pumpkins. 4 to make into pie, 2 to carve and 1 decorative white one that may or may not get carved. 


I've taken the time to look at prices in the stores since then and we got a great deal! The tiny ornamental pumpkins that are no bigger than a fist are $2 each where I looked! 
I'm really looking forward to turning these little beauties into delicious pie!! 


l l l l l